
Provenance Guide
Overview
Provenance is a new plugin for CS61B that keeps a log of coding activity while working on assignments. The tool works locally, which means it does not require internet, and does not have access to any files beyond the CS61B repo. If there are any questions about privacy or the tool overall, please make a private post on Ed.
Setup (IntelliJ)
To get started, install the Provenance Recorder plugin in IntelliJ.
-
Open IntelliJ. On macOS, click IntelliJ IDEA → Settings. On Windows, click File → Settings.
-
In the window that appears, click Plugins in the menu on the left.
-
Click Marketplace and enter “Provenance Recorder” in the search bar at the top. The Provenance Recorder plugin entry should appear.
The Provenance plugin is only supported on new versions of IntelliJ, specifically 261.0+ (which corresponds to version IntelliJ IDEA 2026.1). If you are not able to see the plugin in the Marketplace, you may need to update/reinstall IntelliJ.
If using multiple devices, make sure to install the plugin for each device.
-
Click the green Install button to install the plugin.
-
Click Apply and OK to apply your changes and exit the Plugins window.
-
Continue to Working on the Assignment.
Setup (VSCode)
Note that staff support will be very limited for users of VSCode.
To get started, install the Provenance Recorder plugin in VSCode.
-
Open VS Code. Click the Extensions icon in the left sidebar (four squares), or press Shift+Cmd+X (macOS) / Ctrl+Shift+X (Windows/Linux).
-
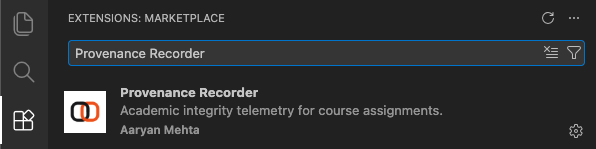
Enter “Provenance Recorder” into the search bar that appears at the top of this sidebar. The Provenance Recorder plugin entry should appear.
The Provenance plugin is only supported on new versions of VSCode, specifically 1.100+. If you are not able to see the plugin in Extensions, you may need to update/reinstall VSCode.
If using multiple devices, make sure to install the plugin for each device.
-
Click the blue Install button to install the plugin.
-
Continue to Working on the Assignment.
Working on the Assignment
-
Work on the assignment as normal! Note that if you had the assignment open before installing the plugin, or if the plugin isn’t appearing, you may need to close and re-open the assignment.
-
The following should appear on the bottom of your screen in IntelliJ (or VSCode):

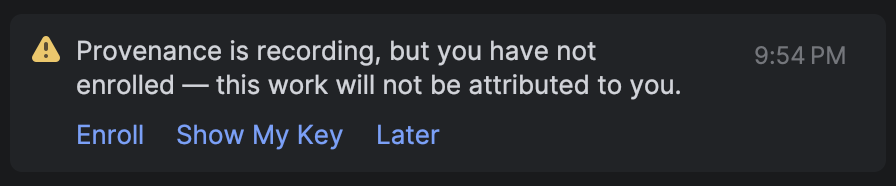
You may see warnings (such as the one below) that Provenance is “not enrolled.” Please ignore those warnings. As long as it says recording, then it is working correctly.
Do not modify any Provenance files. It might mess up configuration files preventing submissions from working.
Submission
When pushing your code to GitHub, make sure that your .provenance folder is included. You can do this by adding it manually to git before submitting the assignment normally by running
git add .provenance
The other option is to add all new changes to GitHub by running:
git add .
git commit -m "{commit message}"
git push origin main